
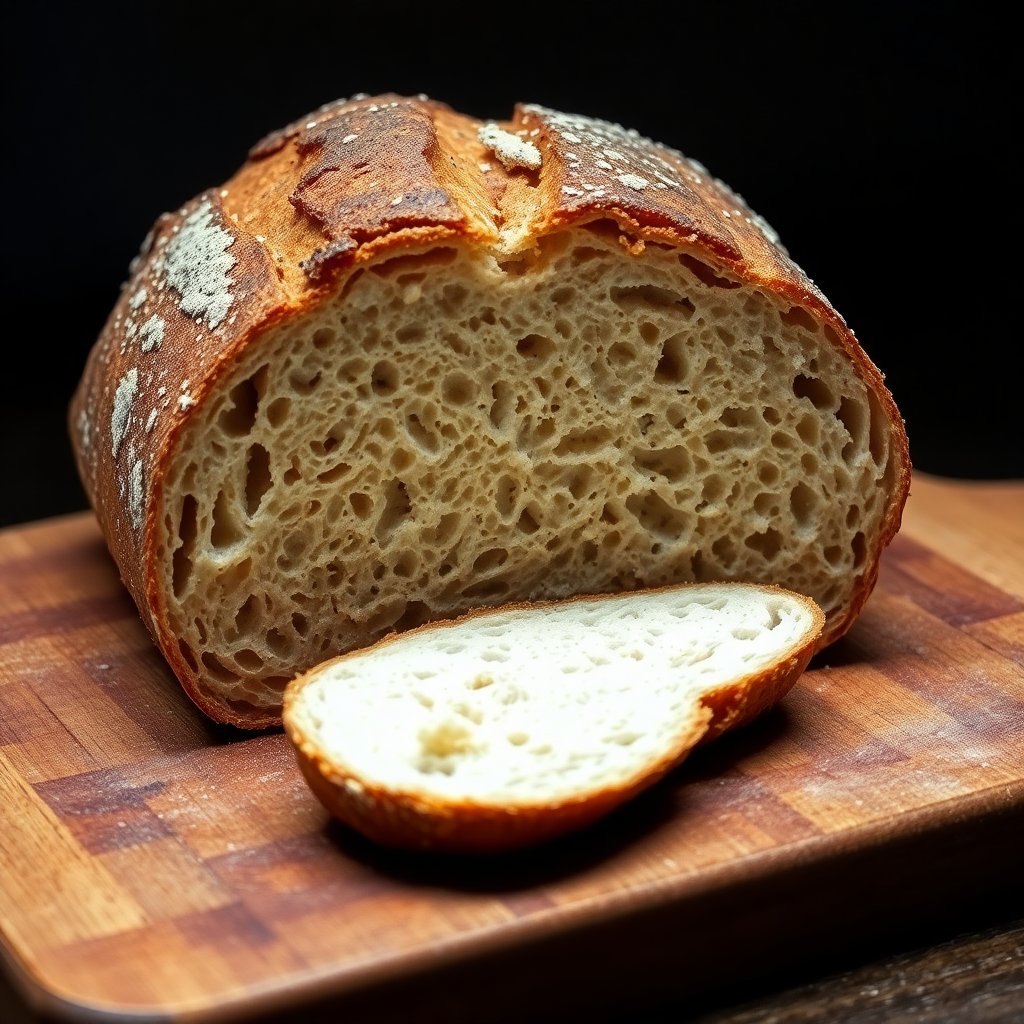
Few things deflate a baker faster than cutting into a loaf you waited two days for and finding a tight, heavy crumb with a gluey streak near the bottom. The good news is that a dense, gummy sourdough almost never has a mysterious cause. It traces back to a short list of culprits, and once you learn to read the loaf, you can usually pinpoint which one bit you and fix it on the very next bake.
As an Amazon Associate we earn from qualifying purchases. The tools below are ones I reach for on every bake — they are what make diagnosing a problem loaf possible in the first place.
First, Read the Loaf
Before changing anything, slice a cool loaf cleanly and look at the crumb. The pattern tells you where the problem lives.
- Tight and even all over, with thick walls between small holes usually means weak fermentation — a sluggish starter or not enough rise.
- A dense, compressed band along the bottom (often called a gum line) that feels sticky or raw points to under-proofing, under-baking, or slicing the loaf while it is still warm.
- A pale, squat loaf that barely grew in the oven suggests the dough ran out of gas before it hit the heat.
- Big irregular tunnels up top with a dense base often signals the opposite problem — dough that over-proofed and collapsed.
Keep that map in mind as we work through the causes in the order they most often trip people up.
Cause 1: A Starter That Was Not Ready
The single most common reason for a heavy loaf is a starter that was not at its peak when it went into the dough. A starter that is young, cold, underfed, or past its rise simply does not have the microbial horsepower to leaven a full loaf. You can do everything else perfectly and still get a brick.
The reliable test is the float test paired with timing. A healthy, active starter roughly doubles in a predictable window after feeding (often 4 to 8 hours at room temperature, depending on its strength and your kitchen), smells pleasantly tangy rather than sharply acetone-like, and holds a domed top. If a spoonful floats in water, it is full of gas and ready to work.
If your starter has been living in the fridge, give it two or three feedings at room temperature before you bake with it. For a full walkthrough of what peak activity looks like and how to time it, see our guide on how to tell when your sourdough starter is ready to use. Baking with a starter caught on the way up — not sagging back down — is the foundation everything else rests on.
A clear glass jar and a rubber band to mark the starting level turn this from guesswork into a measurement. → Shop sourdough starter jars on Amazon
Cause 2: Under-Proofing (The Usual Suspect for a Gum Line)
That dense, sometimes sticky band near the bottom of the loaf is the classic signature of dough that went into the oven before it was ready. Under-proofed dough has not built enough gas structure, so it springs unevenly and the lower portion stays compressed.
Proofing is about gas development, not the clock. The same recipe can need six hours in a warm summer kitchen and twelve in a cool fall one. Judge the dough, not the timer: a properly proofed loaf has grown noticeably (not quite doubled for most recipes), feels airy and jiggly, and holds a slow, partial spring back when you poke it. If your finger dent fills back immediately and completely, it needs more time.
Fall and winter are when this problem spikes, because a kitchen that drifts down to the mid-60s Fahrenheit can double your proofing time without warning. Understanding the whole rise is worth the read — our complete guide to bulk fermentation breaks down what to watch for at each stage so you stop guessing.
Cause 3: Temperature You Are Not Measuring
Dough temperature is the quiet lever that governs how fast everything ferments, and most beginners never measure it. Yeast and bacteria slow dramatically as the dough cools, so a batch mixed with cold flour and cold water in a cold kitchen can crawl while your recipe assumes it is racing.
Aim for a final dough temperature in the high 70s Fahrenheit for a typical timeline, and check it with an instant-read thermometer right after mixing. If it comes in cold, move the dough somewhere warmer or extend the proof. If your kitchen simply runs chilly this time of year, a few small habits — warm (not hot) water, a turned-off oven with the light on, a proofing spot away from drafts — make a real difference and keep fermentation on pace through the cold months.
A fast, accurate thermometer also confirms the finished bake, which brings us to the next cause. → Shop instant-read thermometers on Amazon
Cause 4: The Loaf Was Not Fully Baked
A gummy crumb is sometimes simply raw crumb. Sourdough is a high-hydration, dense dough, and it needs more time and internal heat than many people expect. Pulling it when the crust merely looks brown can leave the center set but still pasty.
Bake until the internal temperature of a lean sourdough reaches roughly 205 to 210 degrees Fahrenheit in the center — that is the range where the starch has fully gelatinized and the crumb sets properly. A thermometer removes all doubt here. If your loaves brown too fast on the outside before the middle catches up, lower the oven by 15 to 25 degrees and extend the time, or tent the top with foil for the final stretch.
Cause 5: You Sliced It Too Soon
This one hurts because the loaf was fine. Sourdough keeps cooking as it cools — residual heat finishes setting the crumb and lets excess moisture redistribute and escape. Cut into a hot loaf and you compress the still-soft structure and trap steam, which reads as a gummy, dense texture even in a perfectly baked bread.
Wait at least two hours, and ideally until the loaf is fully cool to the touch, before slicing. For enriched or very large loaves, give it longer. Patience here is free and fixes more "gummy" complaints than any technique change. A serrated bread knife and a flat cooling rack that lets air circulate underneath both help the loaf finish properly. → Shop bread knives and cooling racks on Amazon
Cause 6: Hydration or Flour Working Against You
If your crumb is consistently tight despite good fermentation, look at the dough itself. Very high hydration demands strong gluten development and confident handling; push the water too far before your technique catches up and the dough spreads and bakes dense. Low-protein all-purpose flour, or a heavy proportion of whole grain without extra water, can also weigh a loaf down because whole grains absorb more liquid and cut the gluten network.
Dial in one variable at a time. If you suspect hydration, our sourdough hydration levels guide explains how to match water to your flour and skill level so the dough stays manageable while still opening up. For most strugglers, backing hydration down slightly and switching to a solid high-protein bread flour produces a dramatic improvement on the next bake.
A Fast Diagnostic Checklist
Run through this the next time a loaf disappoints, in order:
- Was the starter at peak? Doubled, domed, floats, smells tangy. If not, fix this first — nothing else matters without it.
- Did the dough actually proof enough? Airy, jiggly, slow partial spring-back. Judge the dough, not the clock.
- What was the dough temperature? Cold dough ferments slowly. Measure it.
- Did it bake to 205 to 210 degrees inside? Brown crust alone is not proof of doneness.
- Did you let it cool fully before slicing? At least two hours, ideally longer.
- Are hydration and flour appropriate for your skill? Back off water and use strong bread flour if the crumb stays tight.
Nine times out of ten the answer is a weak starter or an under-proof, and both are entirely within your control. For a deeper library of technique explainers and side-by-side crumb photos, King Arthur Baking's learning hub is a trustworthy, ad-light reference worth bookmarking.
The Encouraging Part
Dense sourdough is a solvable puzzle, not a verdict on your baking. Every heavy loaf is data: read the crumb, match it to a cause, change one thing, and bake again. The bakers who end up with reliably open, airy crumb are simply the ones who learned to diagnose instead of despair. Keep a thermometer handy, trust the dough over the timer, and give each loaf the full cool it deserves — do those three things and most gummy loaves disappear for good.
As an Amazon Associate we earn from qualifying purchases. This article contains affiliate links; if you buy through them we may earn a small commission at no additional cost to you.